Library implementation tool
This page can be used to generate a function’s template and (in the future) a VelesDocs entry. Fill out the necessary details to implement your questionnaire. If you want, you can also specify the items themselves here.
View detailed contributing manual
Thank you for wanting to contribute to the VelesLibrary! Here you’ll find a detailed, illustrated instruction on how to implement your questionnaires. In most cases, you don’t even need to know how to code! Here we assume that you don’t know anything about Git and GitHub. To even begin the implementation process, you need to create a GitHub account and download and install GitHub Desktop (unless you want to use Git directly).
To add some code to the VelesLibrary, you need to create your own copy of the library (so called fork), make and confirm some changes (commit), send them to GitHub (push) and open a request to add them to the main library (open a Pull Request (PR)). Here we will discuss this process in detail.
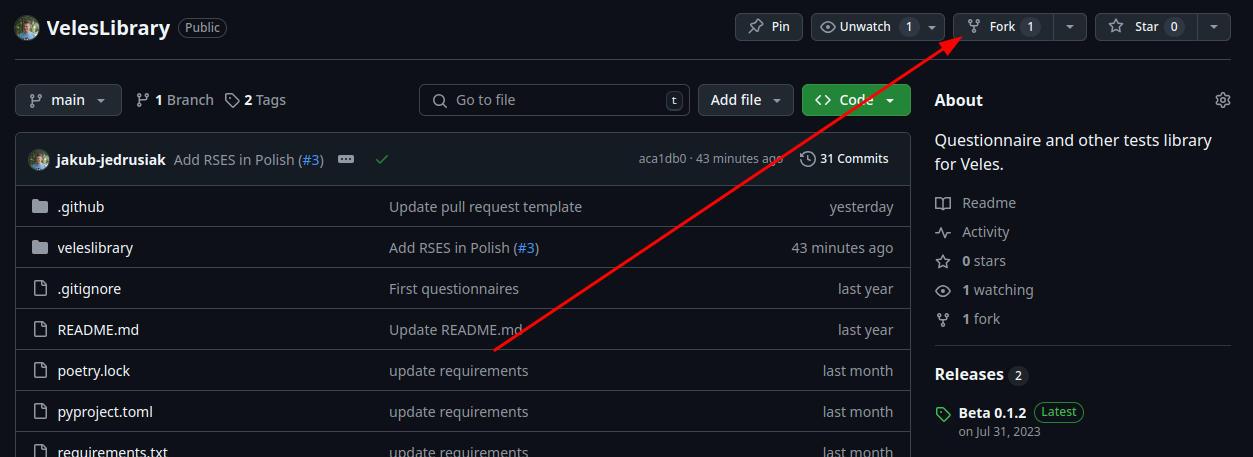
- The library consists of two code repositories – the code itself (VelesLibrary) and the documentation on this website (VelesDocs). The first thing we will do is to fork both repositories. Go to the VelesLibrary GitHub page and click the Fork button (see the figure). Then accept it as is. After you fork VelesLibrary, do the same with VelesDocs.
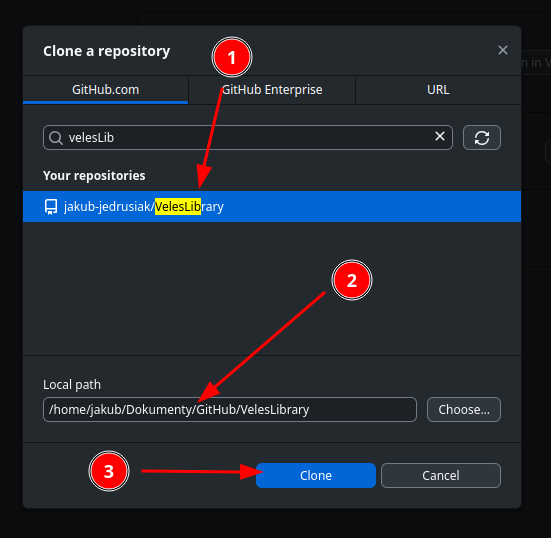
- Then we need to download (or clone) both our new forks. Open the GitHub Desktop app, login, go to File → Clone repository…, search for VelesLibrary, confirm and select a folder you want do save the library in. Do the same with VelesDocs.
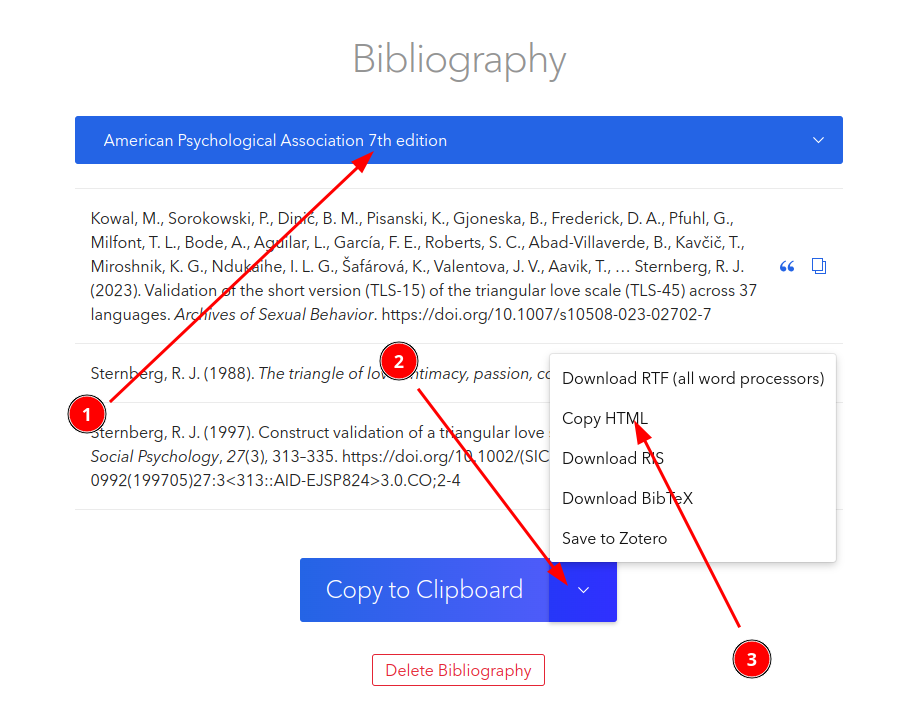
- Now you can create your code. Fill out the form on this page with all the necessary informations and click Generate. Mind the citations! You must use ZBib to create your citations. When you do that, be sure to set APA 7 citation style and actually copy the HTML. See the figure.
- When you generate the files, be sure to unfold appropriate sections and check if everything looks OK in the documentation. Especially look at the reliability coefficients.
- Now you can download the files. The first file (with the .py extension) is the code itself. It needs to go to the VelesLibrary folder. See the text to select an appropriate subfolder. It will most probably be the
veleslibrary/questionnairessubfolder. If your test is in English, it will go to the folder directly. If it’s in a different language, it will go so an appropriate subfolder. Just put your file there. - Now you need to edit the
__init__.pyfile. Open it in any text editor and at the end of the file, add an appropriate import closure. Don’t worry, the generated instructions will tell you how your closure should look like. Copy and paste the line to the file.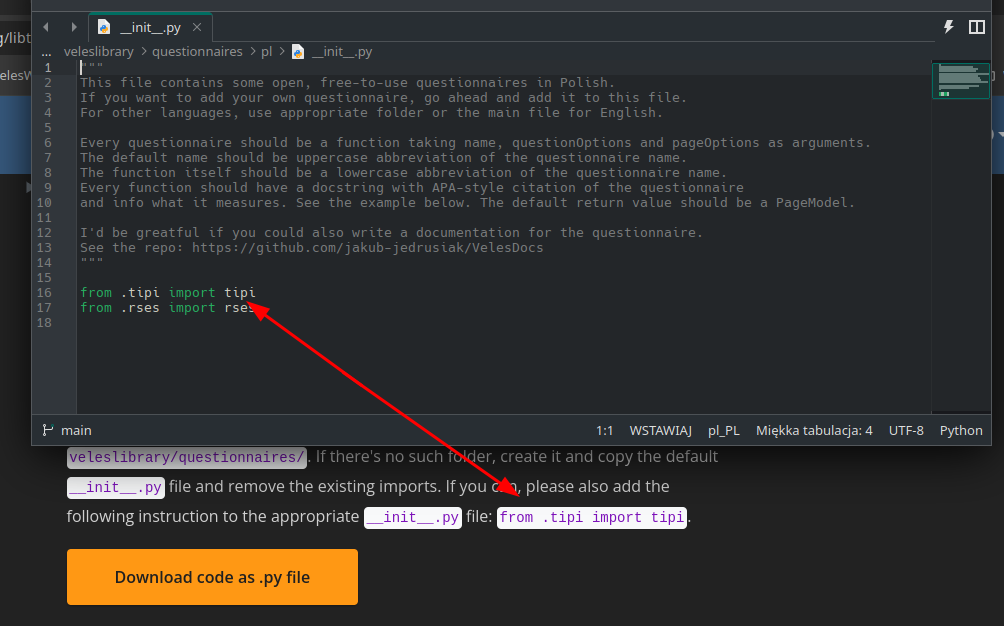
- Now download the documentation file (.qmd extension). Put it in your VelesDocs folder, in the library subfolder. Look for an appropriate language code.
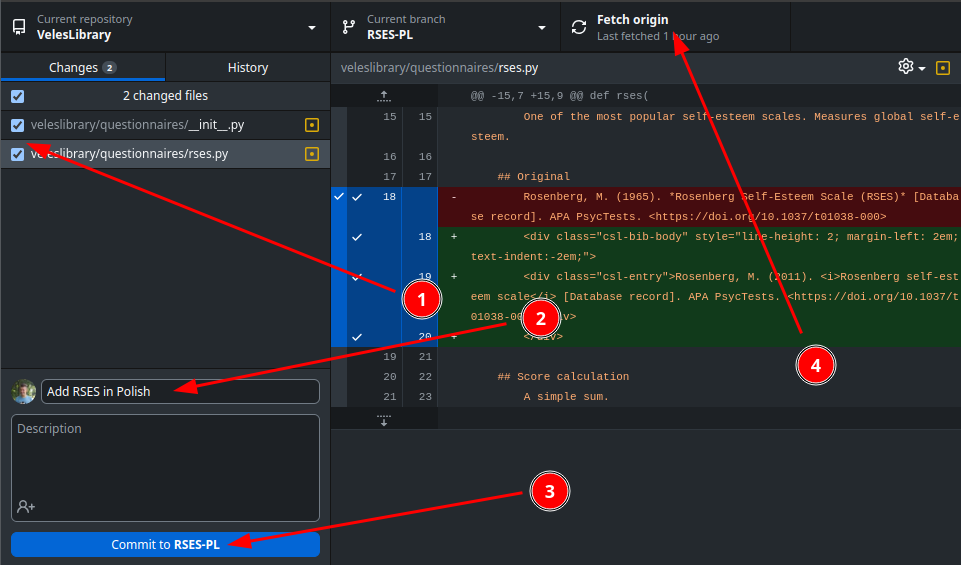
- Now we’re ready to commit the changes in both repositories. Open the VelesLibrary repo in GitHub Desktop. On the left, you’ll see both changed files. Mark them, add a commit message (e.g. “Add RSES in Polish”) and commit the changes. Click the appropriate button to push the changes. See the figure. Do the same with VelesDocs.
- Now we need to open Pull Requests on both repos. Start with VelesLibrary. There should be an appropriate button in GitHub Desktop, but you can also go to your fork’s GitHub page and you will see a big, bright button urging you to open a Pull Request. Click it and fill out the form. Do the same with VelesDocs.
- Done. A maintainer should review your changes, correct the mistakes (if any) and merge your Pull Request. After that, your contribution will serve any scientist who would want to use the questionnaire.